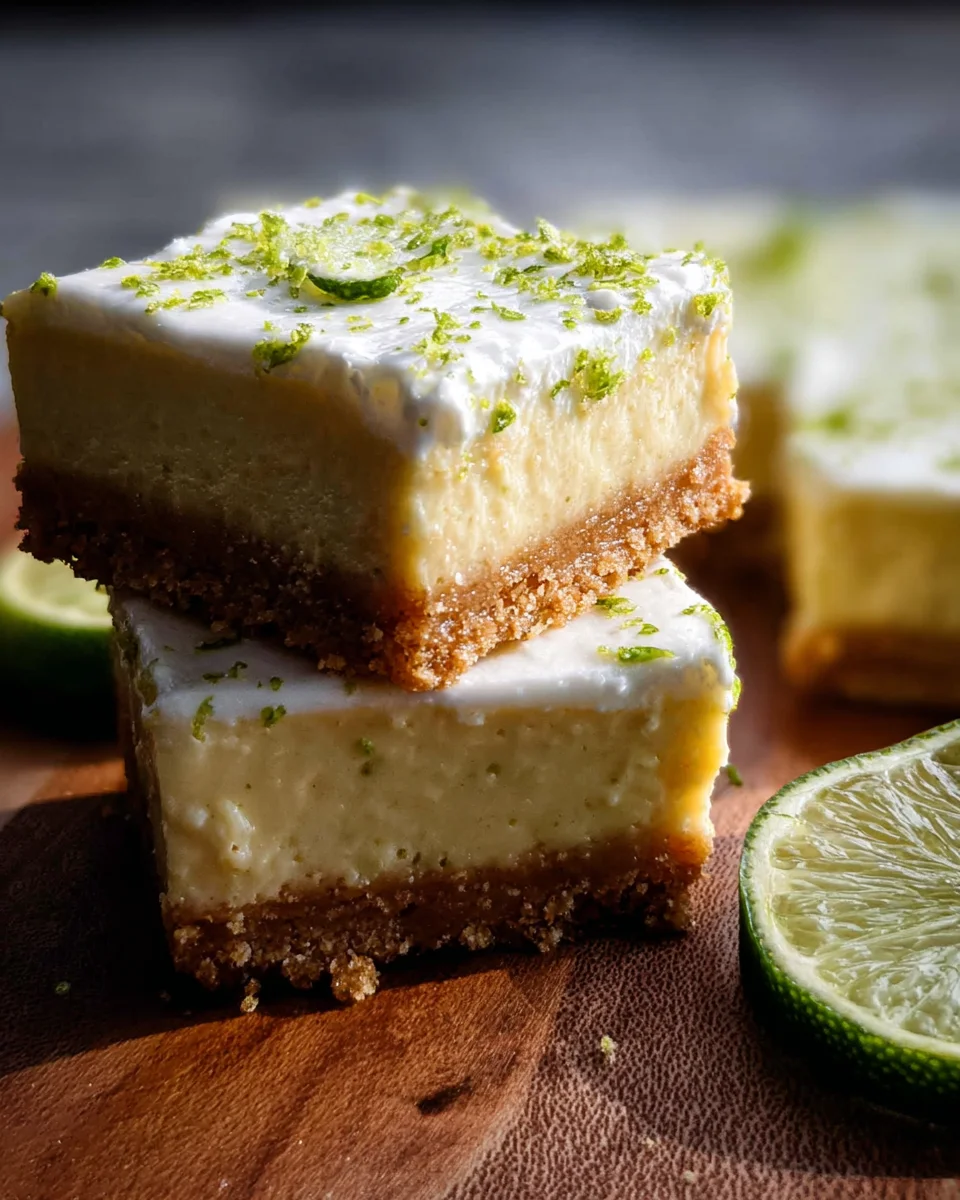
These Key Lime Pie Bars are the perfect summer treat! With their refreshing tartness and creamy texture, they are sure to impress at any gathering. Whether you’re hosting a barbecue or simply enjoying a sunny day at home, these bars are easy to make and even easier to enjoy. Their bright flavor and simple preparation make them a delightful addition to your dessert repertoire.
Jump to:
- Why You’ll Love This Recipe
- Tools and Preparation
- Essential Tools and Equipment
- Importance of Each Tool
- Ingredients
- For the Crust
- For the Filling
- For the Topping
- How to Make Key Lime Pie Bars
- Step 1: Prepare the Oven and Baking Dish
- Step 2: Make the Crust
- Step 3: Bake the Crust
- Step 4: Prepare the Filling
- Step 5: Fill with Key Lime Mixture
- Step 6: Bake Again
- Step 7: Chill
- Step 8: Whip Cream for Topping
- Step 9: Serve
- How to Serve Key Lime Pie Bars
- Chill with Whipped Cream
- Garnish with Lime Zest
- Pair with Fresh Berries
- Add a Coconut Twist
- Serve with Ice Cream
- Enjoy with Iced Tea
- How to Perfect Key Lime Pie Bars
- Best Side Dishes for Key Lime Pie Bars
- Common Mistakes to Avoid
- Storage & Reheating Instructions
- Refrigerator Storage
- Freezing Key Lime Pie Bars
- Reheating Key Lime Pie Bars
- Frequently Asked Questions
- Can I use other types of limes for Key Lime Pie Bars?
- How do I make my Key Lime Pie Bars more tart?
- Can I customize my Key Lime Pie Bars?
- What should I serve with Key Lime Pie Bars?
- Final Thoughts
- 📖 Recipe Card
Why You’ll Love This Recipe
- Easy to Prepare: With just a few simple steps, you can whip up these delicious bars in no time.
- Deliciously Tangy: The combination of key lime juice and zest offers a refreshing taste that brightens any occasion.
- Perfect for Sharing: Cut into squares, these bars are great for parties, picnics, or potlucks.
- No-Bake Option: While they do require some baking, they can also be chilled for a cool dessert without turning on the oven.
- Versatile Serving Suggestions: Serve them plain or topped with whipped cream for an extra touch of indulgence.
Tools and Preparation
Before diving into the recipe for these delightful Key Lime Pie Bars, gather your essential tools. Having everything ready will make the process smoother and more enjoyable.
Essential Tools and Equipment
- 9×13 inch baking dish
- Mixing bowls
- Whisk
- Rubber spatula
- Zester or grater
- Measuring cups and spoons
Importance of Each Tool
- Baking Dish: A 9×13 inch dish is perfect for creating thick, shareable bars that hold their shape well.
- Mixing Bowls: Having multiple sizes allows you to mix ingredients easily without making a mess.
- Whisk: A whisk helps achieve a smooth filling by thoroughly blending the egg yolks and condensed milk.
Ingredients
These perfectly tart and tangy key lime pie bars are a breeze to make and are delicious served straight from the fridge on a hot summer day!
For the Crust
- 2 cups vanilla wafer cookies, finely ground (250 g)
- 5 tablespoons unsalted butter, melted
- 2 tablespoons light brown sugar
For the Filling
- 1 tablespoon lime zest, packed (6-7 key limes)
- 5 large egg yolks
- 22 ounces sweetened condensed milk, (1 14-ounce can and ¾ cup from 2nd can)
- 1 cup freshly squeezed lime juice
For the Topping
- 1 cup heavy whipping cream
- 2 tablespoons powdered sugar
How to Make Key Lime Pie Bars
Step 1: Prepare the Oven and Baking Dish
Preheat your oven to 350°F (175°C). Grease your 9×13 inch baking dish lightly with cooking spray or butter to prevent sticking.
Step 2: Make the Crust
- In a mixing bowl, combine the finely ground vanilla wafer cookies, melted butter, and light brown sugar.
- Mix until all ingredients are well combined.
- Press this mixture firmly into the bottom of your prepared baking dish to form an even layer.
Step 3: Bake the Crust
Place the crust in the preheated oven and bake for about 10 minutes. This step helps set the crust before adding the filling.
Step 4: Prepare the Filling
- In another mixing bowl, whisk together the lime zest, egg yolks, and sweetened condensed milk until smooth.
- Gradually add in the freshly squeezed lime juice while continuing to whisk until well blended.
Step 5: Fill with Key Lime Mixture
Once your crust has baked and cooled slightly, pour the key lime mixture over it evenly.
Step 6: Bake Again
Return to the oven and bake for an additional 15-20 minutes until set but not overcooked. The filling should slightly jiggle in the center when done.
Step 7: Chill
Allow the bars to cool at room temperature before refrigerating them for at least two hours or until fully chilled.
Step 8: Whip Cream for Topping
In a mixing bowl, beat together heavy whipping cream and powdered sugar until soft peaks form.
Step 9: Serve
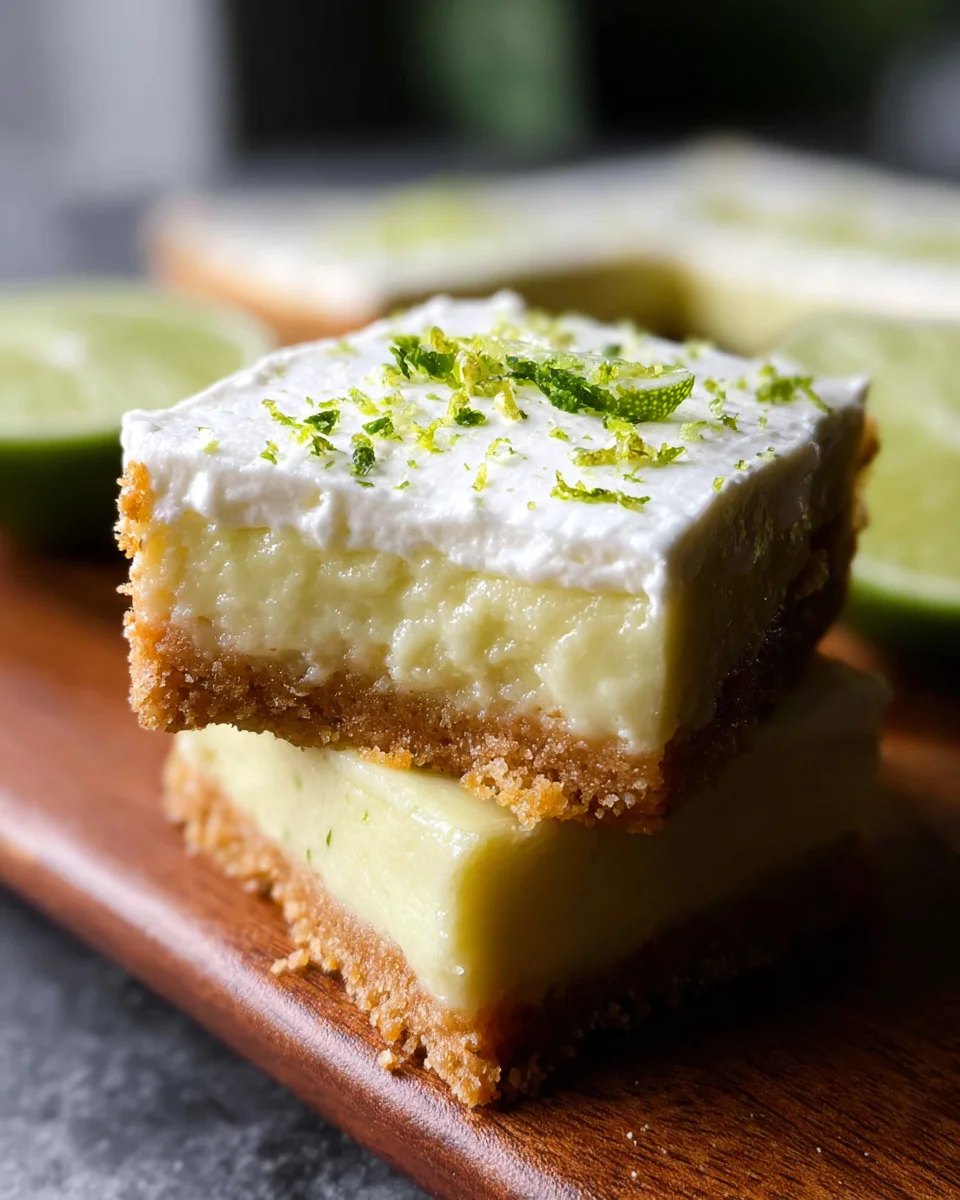
Cut into squares before serving. Top each square with a dollop of whipped cream if desired. Enjoy your refreshing Key Lime Pie Bars!
How to Serve Key Lime Pie Bars
Key lime pie bars are a delightful treat that can be enjoyed in various ways. Here are some serving suggestions to elevate your dessert experience.
Chill with Whipped Cream
- Top each bar with a dollop of fresh whipped cream for added creaminess and a touch of sweetness.
Garnish with Lime Zest
- Sprinkle some lime zest over the bars just before serving to enhance the citrus flavor and add a pop of color.
Pair with Fresh Berries
- Serve your key lime pie bars alongside fresh berries like strawberries or blueberries for a refreshing contrast.
Add a Coconut Twist
- Drizzle toasted coconut flakes over the bars for an extra layer of flavor and texture that complements the key lime.
Serve with Ice Cream
- A scoop of vanilla or coconut ice cream on the side makes these bars even more indulgent and refreshing.
Enjoy with Iced Tea
- Pair your key lime pie bars with a glass of sweetened iced tea for a perfect summer treat.
How to Perfect Key Lime Pie Bars
To ensure your key lime pie bars turn out perfectly every time, follow these helpful tips.
- Use Fresh Limes: Freshly squeezed lime juice gives the best flavor. Avoid bottled juice if possible for authentic taste.
- Chill Before Serving: Refrigerate the bars for at least two hours before serving to let them set properly and enhance their flavor.
- Don’t Overbeat Egg Yolks: When combining the egg yolks, mix them gently to prevent too much air from getting in, which can affect texture.
- Adjust Sweetness: If you prefer sweeter bars, add a bit more sugar to the filling, but remember that key lime is meant to be tart.
- Check for Doneness: The filling should be slightly jiggly in the center when you take it out of the oven; it will firm up as it cools.
- Cut with a Warm Knife: Dip your knife in hot water before cutting the bars for clean slices without crumbling.
Best Side Dishes for Key Lime Pie Bars
Key lime pie bars are delicious on their own, but pairing them with complementary side dishes can enhance your dessert experience. Here are some great options:
- Minted Fruit Salad: A refreshing mix of seasonal fruits tossed with fresh mint leaves enhances the tartness of key lime.
- Coconut Rice Pudding: This creamy dessert adds a rich texture that balances well with the tangy key lime flavor.
- Lemon Sorbet: A light and zesty sorbet provides an additional citrus kick that pairs wonderfully with key lime.
- Pineapple Salsa: Sweet pineapple salsa adds a tropical element that complements the zesty notes in key lime pie bars.
- Cucumber Salad: A cool cucumber salad dressed lightly in vinegar offers a crisp contrast to the rich dessert.
- Homemade Lemonade: Refreshing lemonade provides a sweet-tart drink option that matches perfectly with these bars.
- Chilled Green Tea: Lightly sweetened green tea serves as a soothing beverage that pairs well without overpowering the dessert.
- Grilled Peaches: Sweet grilled peaches drizzled with honey bring out caramelized flavors that complement citrus desserts beautifully.
Common Mistakes to Avoid
Making key lime pie bars can be simple, but avoiding common mistakes is crucial for the perfect treat.
- Not using fresh lime juice: Always opt for freshly squeezed lime juice over bottled. Fresh juice enhances the flavor and gives your bars that authentic tanginess.
- Overbaking the bars: Keep an eye on baking time! Overbaking can lead to a dry texture. Bake until just set for the best results.
- Ignoring temperature: Allow your bars to cool completely before refrigerating. This ensures they set properly and have a delicious texture.
- Skipping lime zest: Don’t skip the lime zest; it intensifies the flavor. Always add it for that extra zing in your key lime pie bars.
- Using cold eggs: Use room temperature eggs for better incorporation into the mixture. Cold eggs can cause lumps and less smooth filling.
Storage & Reheating Instructions
Refrigerator Storage
- Store key lime pie bars in an airtight container.
- They will last up to 5 days in the fridge.
- Place parchment paper between layers if stacking for easy serving.
Freezing Key Lime Pie Bars
- Wrap individual bars tightly in plastic wrap or foil.
- Store them in a freezer-safe container or bag.
- They can be frozen for up to 3 months.
Reheating Key Lime Pie Bars
- Oven: Preheat to 350°F (175°C) and warm for about 10 minutes. Make sure not to overheat, as it may alter texture.
- Microwave: Heat individual squares on low power for about 15-20 seconds. Check frequently to avoid overheating.
- Stovetop: Place in a covered skillet on low heat for a few minutes, just until warmed through.
Frequently Asked Questions
Here are some common questions about making key lime pie bars.
Can I use other types of limes for Key Lime Pie Bars?
Yes, while key limes are traditional, Persian limes can also work. Just keep in mind that the taste will differ slightly.
How do I make my Key Lime Pie Bars more tart?
To increase tartness, add more lime juice or zest according to your taste preference. Start with an additional tablespoon and adjust from there.
Can I customize my Key Lime Pie Bars?
Absolutely! You can add coconut flakes or even a layer of meringue on top for added flavor and texture.
What should I serve with Key Lime Pie Bars?
Consider pairing these delicious bars with fresh fruit or whipped cream. They also go well with a scoop of vanilla ice cream!
Final Thoughts
These key lime pie bars are not only easy to whip up but also incredibly refreshing. Perfect for summer gatherings or just a sweet treat at home, they can be customized with various toppings or mix-ins. We encourage you to try this recipe and explore different flavors that complement the tartness of key limes!
Did You Enjoy Making This Recipe? Please rate this recipe with ⭐⭐⭐⭐⭐ or leave a comment.
📖 Recipe Card
Print
Key Lime Pie Bars
- Total Time: 50 minutes
- Yield: Makes approximately 12 servings 1x
Description
Indulge in the ultimate summer delight with these refreshing Key Lime Pie Bars. Combining the zesty flavor of key limes with a creamy filling on a buttery crust, these bars are a perfect treat for warm days and festive gatherings. Whether you’re hosting a barbecue or enjoying a quiet afternoon, this easy-to-make dessert is sure to impress your guests. With just a few simple ingredients and minimal prep time, you can whip up these tangy squares that are deliciously chilled and topped with fluffy whipped cream. Get ready to savor every bite of this classic American dessert that captures the essence of summertime.
Ingredients
- 2 cups finely ground vanilla wafer cookies
- 5 tablespoons unsalted butter
- 22 ounces sweetened condensed milk
- 1 cup freshly squeezed lime juice
- 5 large egg yolks
- 1 tablespoon lime zest
- 1 cup heavy whipping cream
Instructions
- Preheat your oven to 350°F (175°C) and grease a 9×13 inch baking dish.
- In a bowl, mix together the ground vanilla wafers, melted butter, and light brown sugar until combined. Press firmly into the bottom of the prepared dish.
- Bake for about 10 minutes until set. Let cool slightly.
- Whisk together lime zest, egg yolks, and sweetened condensed milk in another bowl until smooth. Gradually add lime juice and mix well.
- Pour the filling over the crust and bake for an additional 15-20 minutes until set but still slightly jiggly in the center.
- Cool at room temperature before refrigerating for at least two hours.
- Whip heavy cream with powdered sugar until soft peaks form, then serve on top of chilled bars.
- Prep Time: 20 minutes
- Cook Time: 30 minutes
- Category: Dessert
- Method: Baking
- Cuisine: American
Nutrition
- Serving Size: 1 bar (approximately 80g)
- Calories: 210
- Sugar: 17g
- Sodium: 90mg
- Fat: 11g
- Saturated Fat: 6g
- Unsaturated Fat: 4g
- Trans Fat: 0g
- Carbohydrates: 25g
- Fiber: 1g
- Protein: 3g
- Cholesterol: 120mg
